Trues Toys
Broken toys do not always belong in the trash. A loose wheel, cracked plastic arm, or silent battery compartment can often be repaired with patience and the right tools. This guide to the 2026 best toy repair kits explains how families can handle simple fixes at home. It focuses on practical kits, clear instructions, and safer repair habits.
Learning How to fix broken toys at home starts with identifying the damage. Check whether the problem involves screws, wiring, fabric, glue, or missing parts. A useful kit may include precision screwdrivers, plastic-safe adhesive, tweezers, small pliers, replacement screws, and a soft cleaning brush. Keep a bright lamp nearby. Tiny parts disappear quickly.
Safety matters more than speed. Remove batteries before opening electronic toys. Avoid repairing damaged rechargeable cells unless a qualified technician provides guidance. Sharp tools, strong adhesives, and heated equipment require adult supervision. Washable toys also need special care, because trapped moisture can damage sounds or moving parts. From hands-on repairs, I have learned that forcing a stuck screw often creates a larger crack. That mistake is easy to make. I still make it sometimes.
The best repair kit is not always the largest one. It should match the toy’s materials and the repairer’s skill level. This article compares useful options, explains their limitations, and shows when replacement is wiser than repair. A careful repair can restore play, save money, and reduce unnecessary waste. Yet not every toy can be rescued. Knowing when to stop is part of repairing well.
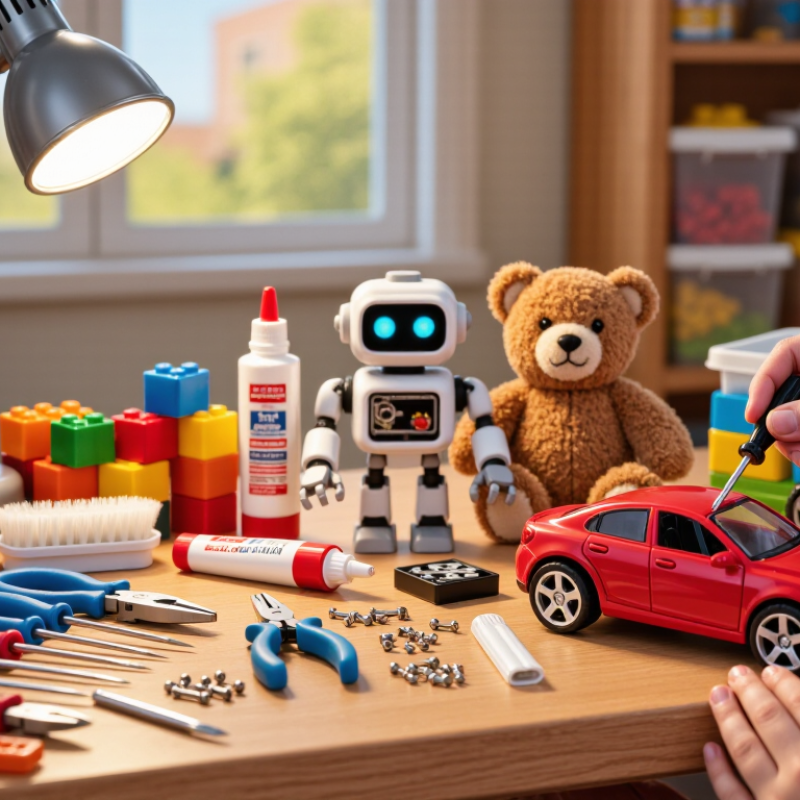
Toy damage usually points to the repair kit you need. Cracked hard plastic requires two-part epoxy, fine sandpaper, and small clamps. Loose wheels or joints need precision screwdrivers, replacement screws, and needle-nose pliers. Fabric tears call for curved needles, strong thread, and fabric patches. Missing battery covers may require a matching replacement part, not glue. Electronic toys need a multimeter, insulated tools, and fresh batteries for testing. Never open a damaged battery.
Clean every surface before repairing it. Remove dust, grease, and loose plastic. Apply adhesive sparingly, then hold the pieces firmly. Excess glue can block moving parts. For stuffed toys, stitch from the inside when possible. A neat outside seam looks better, but it may not hold under pulling. Test repaired wheels, buttons, and hinges gently before giving the toy back to a child. Read the kit instructions carefully, especially for curing time and ventilation.
Tips: Match the repair material to the toy material. Use clamps for straight cracks. Keep tiny screws away from young children. Avoid repairing toys with sharp edges, exposed wires, overheating parts, or damaged batteries. If a repair feels uncertain, replace the part instead. A repair can look finished and still fail later. Check it again after one day.
A safe toy repair kit starts with simple, reliable tools. Keep small Phillips and flat-head screwdrivers, a plastic pry tool, tweezers, and needle-nose pliers nearby. A soft cloth protects painted surfaces from scratches. A small tray prevents screws from disappearing under furniture.
Use materials that match the toy. Choose replacement screws with the same size and thread. Use non-toxic craft adhesive only on areas children cannot easily pull apart. For loose wires, heat-shrink tubing offers better protection than exposed tape. A basic multimeter can check broken connections, but remove all batteries before opening an electronic toy. Never open a swollen, leaking, or hot battery. Set it aside safely and seek proper disposal guidance.
Inspect the toy under bright light before touching it. Look for sharp plastic, cracked edges, loose magnets, and missing fasteners. I often photograph each step, because memory becomes unreliable after several tiny screws. Clean dusty joints with a dry brush, not liquid. Tighten screws firmly, but avoid crushing soft plastic. It is an easy mistake. After repair, pull gently on every attached part and test moving sections slowly. A repaired wheel may still wobble. That is a sign to stop and reassess, not to force it. Keep small parts away from young children during the entire repair. Different toys need different methods, so the safest repair may be leaving a damaged part untouched.
Plastic, wooden, and fabric toys need different repair methods. The United Nations Environment Programme’s Global Resources Outlook 2024 reports that global resource extraction has tripled since 1970. Repairing one toy can reduce unnecessary material use. It also teaches children practical care.
For cracked plastic, wash and dry the parts completely. Lightly roughen the edges with fine sandpaper. Use a child-safe adhesive suitable for the plastic type, then hold the pieces with masking tape. Let the joint cure for the full stated time. Do not repair loose battery covers with sharp metal parts. The U.S. Consumer Product Safety Commission advises checking toys for small detachable pieces, especially when young children use them. My first repair often used too much adhesive. The joint looked messy. Less glue usually works better.
Wooden toys need clean, dry surfaces. Apply suitable wood adhesive, align the split, and clamp it gently. Wipe away squeezed-out glue before it hardens. Sand rough edges after curing, but keep the original shape. For fabric toys, stitch torn seams with strong thread and small, even stitches. Replace loose stuffing only when the fabric can close securely. The 2024 Circularity Gap Report estimated global circularity at just 7.2%, showing how rarely materials return to useful cycles. A visible seam is acceptable. A sharp edge is not. Test wheels, joints, stitching, and painted surfaces before returning the toy to play. Repair can fail. Check it again tomorrow.
Typical full-cure times for common home repair methods used on plastic, wooden, and fabric toys.
Plastic repairs commonly use cyanoacrylate or two-part epoxy, wooden toys are often repaired with PVA wood glue, and fabric toys typically use fabric adhesive or hand stitching. Cure times vary by product, temperature, surface condition, and joint thickness, so the product label should always be followed. Keep small parts and adhesives away from young children.
A useful toy repair kit should include a precision screwdriver set, plastic pry tools, tweezers, a small multimeter, heat-shrink tubing, and spare screws. The U.S. Consumer Product Safety Commission estimated 231,700 toy-related emergency-room injuries in 2023. Careful repairs can reduce sharp edges, loose parts, and exposed wiring around children.
Start with toy electronics by removing batteries and photographing every wire connection. Check the switch, solder joints, and battery contacts for corrosion. A multimeter can identify a broken circuit without guesswork. Never puncture, crush, or open rechargeable cells. Replace damaged battery packs with compatible, certified units. Button batteries require extra caution; the CPSC reports that ingestion incidents can cause severe internal injuries within hours.
Wheels and moving parts often fail because hair, dust, or cracked axles block movement. Clean the axle with a dry brush, then test it by hand. Use only a small amount of plastic-safe lubricant, away from fabric and electrical contacts. For stripped gears, replacing the gear is usually safer than forcing it. I sometimes tighten screws too much, which can split thin plastic. That mistake is easy to make. After repair, pull each wheel, press every button, and check for heat, unusual noise, or loose covers. The ASTM toy safety framework emphasizes accessible edges, small parts, and mechanical hazards, so a repaired toy still needs an adult inspection before returning to play.
After repairing a toy, inspect every joint before giving it back to a child. Pull gently on wheels, handles, ears, and small attached parts. Nothing should wobble, crack, or detach. Check repaired edges with a fingertip. Rough plastic can scratch skin. I also test buttons and battery covers several times. A repair may look perfect but still fail under pressure. That happened to me once.
Clean the toy with a soft cloth and mild soapy water when the material allows it. Keep water away from speakers, lights, switches, and battery compartments. Use a cotton swab for narrow seams. Dry every surface completely before reassembling the toy. Dampness can cause odors, corrosion, or hidden damage. Do not use strong solvents unless the toy’s care instructions clearly permit them. Some finishes react badly.
Storage protects the repair. Place the toy in a dry, shaded area away from heaters and direct sunlight. Keep repaired toys separate from heavy objects that could bend fragile parts. Small screws and removed pieces should stay in a labeled container during future repairs. I sometimes store toys too soon, especially when the surface feels dry. Waiting a little longer would be wiser. Recheck the toy after one day of storage and again after several uses. Stop using it if cracks, loose parts, sharp edges, or unusual smells appear.
Keep small screwdrivers, a plastic pry tool, tweezers, and needle-nose pliers. A soft cloth protects painted surfaces. A shallow tray keeps tiny screws from vanishing.
Inspect it under bright light first. Look for sharp plastic, cracked edges, loose magnets, and missing fasteners. Remove every battery before opening electronic parts.
Use heat-shrink tubing instead of leaving wires covered with exposed tape. Use adhesive only where children cannot pull it apart. Keep adhesive away from moving joints and electrical contacts.
Do not open, puncture, crush, or test it. Set it aside safely and seek proper disposal guidance. Never reuse a visibly damaged battery.
Photograph each wire before disconnecting anything. A basic multimeter can help locate a broken circuit. Keep batteries removed during testing. Memory fails. Photos help.
Brush away hair and dust from the axle. Test the wheel by hand before adding anything. Use only a small amount of plastic-safe lubricant. A wobbly wheel means stop and reassess.
Match replacement screws by size and thread. Tighten them firmly, but do not crush soft plastic. I sometimes tighten screws too much. That can split thin plastic.
Pull gently on wheels, handles, covers, and small attached parts. Press every button and move each section slowly. Check for heat, unusual noise, cracks, sharp edges, or loose pieces. Do not return it to play immediately.
Use a soft cloth and mild soapy water when suitable. Keep moisture away from speakers, switches, lights, and battery compartments. Dry everything completely before reassembly. Store the toy in a dry, shaded place.
Stop using it if parts wobble, cracks reappear, or unusual smells develop. Recheck it after one day and after several uses. Sometimes leaving a damaged part untouched is safer.
This guide explains How to fix broken toys at home with practical, safe methods for common problems. It covers how to identify damage such as cracked plastic, loose wooden parts, torn fabric, missing wheels, weak joints, and simple electronic or battery issues. You will learn how to choose suitable repair kits and use essential tools, including safe adhesives, screwdrivers, replacement fasteners, fabric materials, cleaning supplies, and protective equipment.
The article also presents step-by-step repair techniques for plastic, wood, and fabric toys, along with advice for restoring moving parts, checking battery compartments, and handling basic toy electronics carefully. After each repair, it emphasizes testing the toy for sharp edges, loose pieces, unstable connections, exposed wires, and other safety concerns. Finally, it explains how to clean repaired toys and store them properly so they remain safe, functional, and enjoyable for longer.
